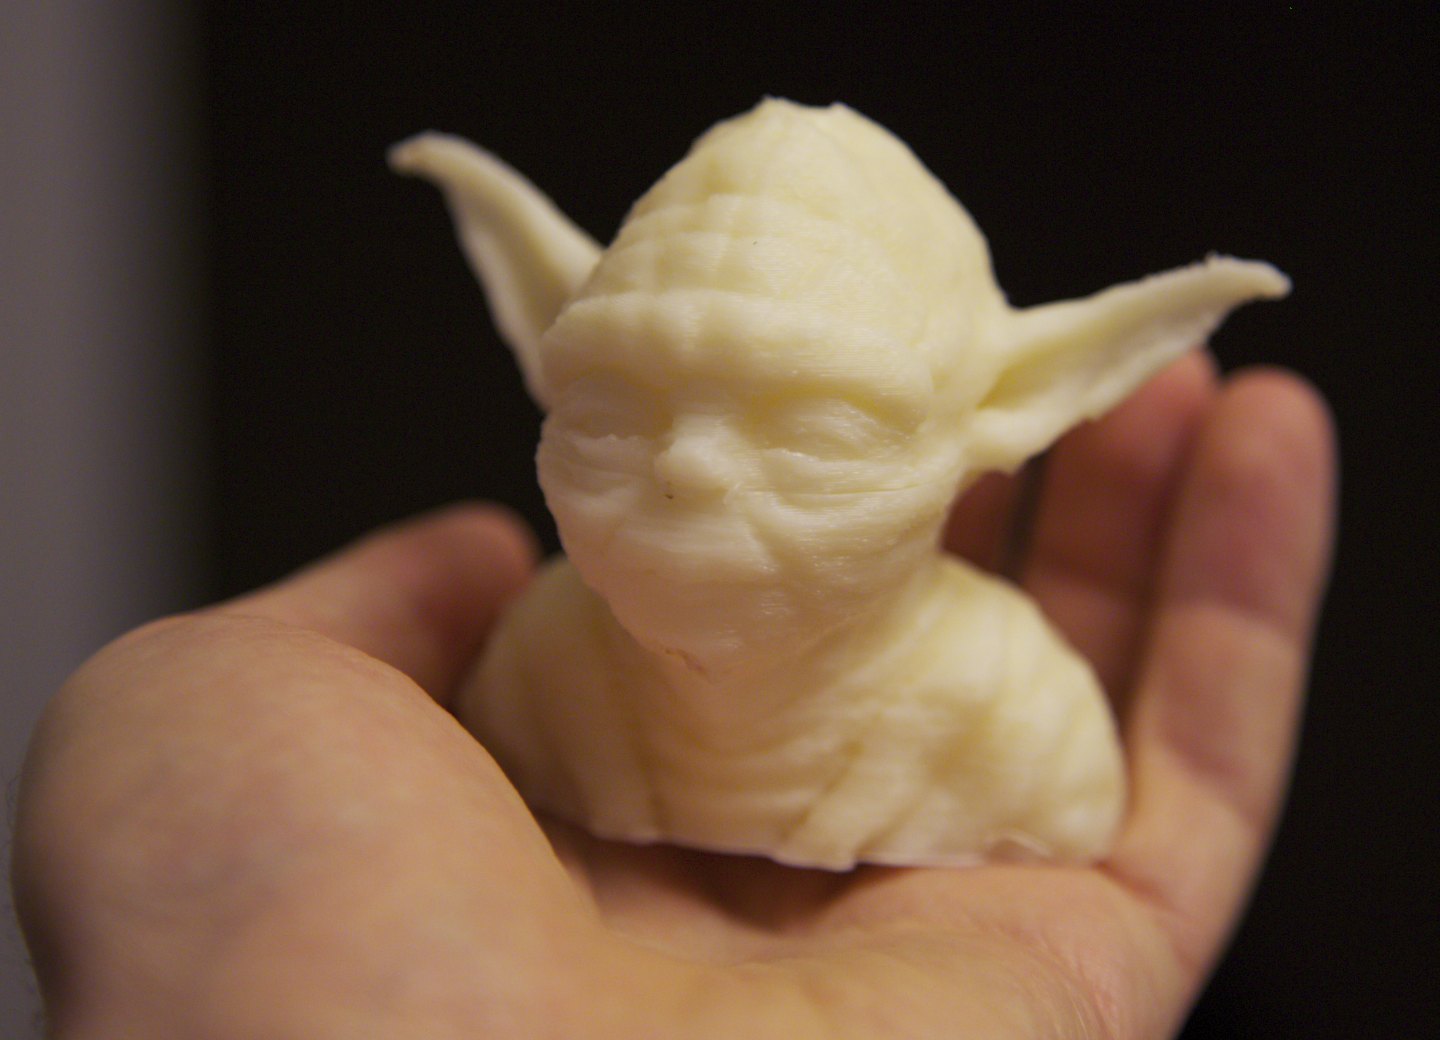
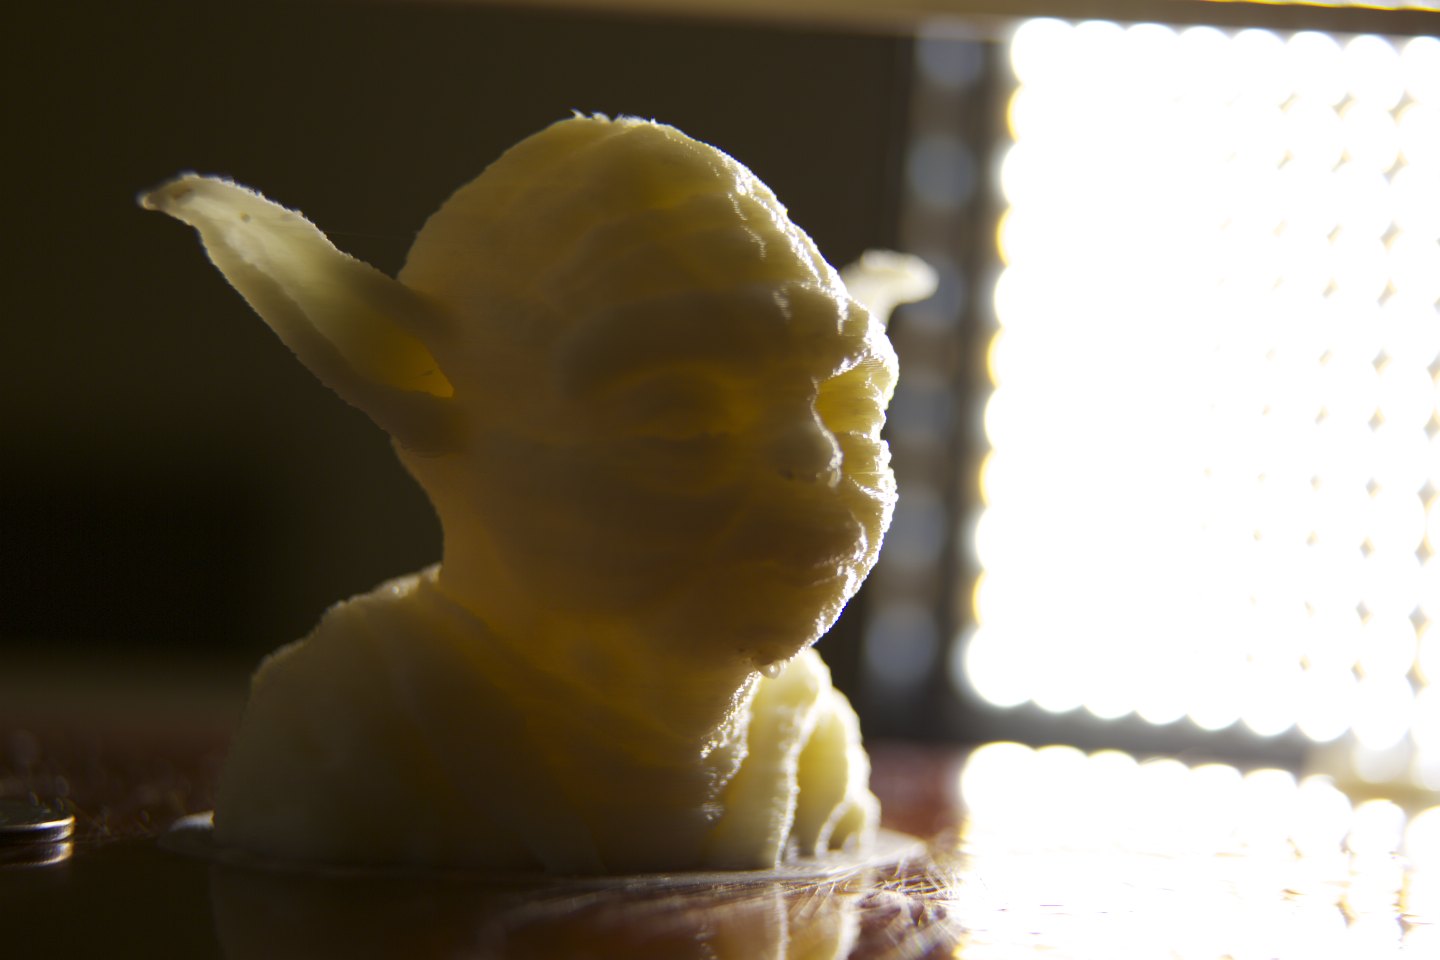
During the 2+ hours it took to print the full-scale Yoda Lite at .2mm layer height the other day, I decided to power up the DSLR and LED light, and document the process. The result is this short video which includes many handheld macro shots of my Printrbot+ in action.
The music is Kenichi ÅŒkuma’s track for the Flat Zone 2 level of the Wii game Super Smash Bros. Brawl; A gratingly blippy tune 1 that evokes 60s-era space age lounge. I wouldn’t normally use commercial music, but as far as I can tell this track is unavailable for purchase (at least in the USA), and it deserves some exposure outside of the 4-year-old video game for which it was composed.
I use the word “grating” with much love, I admire the way the otherwise unpleasant beeps form a catchy tune. ↩︎
I made time to print a 100% scale version of Yoda Lite tonight with my Printrbot+ set to .2mm layer height. Catastrophe struck in the form of a power supply reset right in the middle of printing, but a tip on this page led me to edit the raw gcode of the file such that when I reopened it in macpronterface the print continued almost exactly where it left off, saving me the need to start over and lose over an hour of printing. A slight horizontal line running across just below Yoda’s nose is the only sign of this print issue.
The above print of Mr. Jaws was with a .4mm layer height. The print at bottom is at a .2mm layer height. Smooth!
I disassembled and reassembled the Printrbot+ this weekend. I’ve now upgraded it quite a bit, with accuracy and speed in mind. It now uses GT2 belts and molded polycarbonate/brass pulleys in place of its stock XL belts and printed pulleys, and Acme leadscrews instead of the original threaded rod. Aluminum 5mm-6.35mm couplers connect the leads crews to the z-axis motors, instead of the original set of molded plastic couplers. I bought all of the parts for this round of upgrades from techpaladin.com. Nathaniel was super-helpful, and informed me of parts I’d need that became in-stock just before my order shipped and in time for me to add them.
The result of these upgrades make me very happy. First I printed a popular test object, Mr. Jaws. It went so well that I decided to push the envelope and drop the layer height setting from .4mm to .2mm. This higher-resolution print took twice as long (~27 minutes vs ~14.5 minutes), but the edges of the print are much smoother and the ridges much less pronounced.
Yoda Lite at 50% scale and .2mm layer height
This morning was time to try printing Yoda Lite. I brought its STL file into the program “Slic3r” to convert it to the geode commands that drive the Printrbot+, with layer height set to .2mm, and the software predicted a 2 hour print time. I lowered the fill percentage to .3 from .45 so that the object would be more hollow, but it still was going to take more time than I had if I wanted to arrive to work on time. So I set the object to print at 50% scale and the time estimate dropped to about a half-hour. Capital. 1
I had one abortive print attempt in which 1/3 of yoda printed and then the object stuck to the extruder nozzle and popped from the bed. In order to prevent this from happening again, I adjusted the z axis endstop to print the first layer slightly lower and more flattened by the extruder into the kapton surface of the print bed. You can see this flattening in the circle of plastic or “skirt” around Yoda. It’s a little more flattened than I’d like, as every subsequent layer also gets flattened and the detail in the print is affected, but I wanted it to really stick to the bed this time. The result has some problems around the ears, but made me happy nonetheless. It’s a definite improvement over the pre-upgrade prints.
Never used that one before, but “Yay” just didn’t look very professional. ↩︎
The first somewhat-recognizable blob I printed, a rather squishy version of technoswiss’s printrbot glass clip.
On Sunday, I made a few last-minute adjustments to the Printrbot+, wired the motors and sensors to its circuit board, loaded the software on my computer, powered it up, plugged in the USB cable, and gave it a whirl. Shockingly, the blue smoke remained inside the board and all axes and the extruder responded to computer control.
I applied some blue painter’s masking tape directly to the print bed as a surface, loaded up the extruder, and set it printing technoswiss’s ‘Printrbot glass clips’ so that I could install the 8×8″ sheet of borosilicate glass I’d purchased from McMaster Carr to use as a print bed. The extruded plastic would not stick to the tape. I increased the heat of the bed and extruder and had some success, but eventually gave up on that print surface and applied a surface of heat-resistant Kapton material to the print bed. That worked much better, and produced the squishy version of the clip visible above.
At left, the first print. At right, a better print of the same object after some calibration. The countersunk hole for the bolt can be seen.
Monday’s subsequent attempts at printing didn’t stick to the Kapton, and I realized that I needed to recalibrate the Z-axis and attempt to level the bed, as the hot end of the extruder was just not getting close enough (it’s supposed to print from a distance roughly equal to the thickness of a piece of paper). Problem solved, but as it printed I noticed that the printhead was squishing the printed object around as if it were a block of cheese. I reasoned that this was due to excessive bed temperature, excessive hot-end temperature, a miscalibrated z-axis (the head was not raising enough between layers), and a miscalibrated extruder (it was extruding too much plastic). A few measurements and adjustments later, and a much better print was produced. It seemed like it would be usable, so I printed 3 more.
And then it seemed time to print some replacement parts before the bits that had broken in assembley stopped working. I’d split the y-axis pulley by over tightening and had also broken a y-axis belt clip. I downloaded the files and tried printing these more complicated parts. Unfortunately at this point the broken y-pulley was beginning to slip on the motor shaft, so the y-axis was not stable. The pulley is probably not going to be usable, but it does look cool. The belt clip is slanted due to the slipping y-axis, but it’ll probably work fine. I have more precise GT2 belts and pulleys on order, so it should be printing much more accurately by next week.
The total results of my first couple of days of printing with the Printrbot+.
The most challenging puzzle I’ve yet assembled, with clues scattered over the net –the Printrbot+. Now mechanically complete, but the tasks of wiring it up and the endless tweaking remain.
The web browser on my boss’s PS3 crashed when trying to render a web page containing Adobe Flash. It then displayed the error message “Flash is a poopy head”. In answer to my mildly skeptical tone, he sent me this screenshot he’d taken:
EOS HD has put up a summary of results from a grading test of footage from the new Canon 5D Mark III. It sounds as though this is all footage shot at 6400 ISO, and they’re impressed. The original footage and test can be found on Sam Morgan Moore’s blog.
I’d expect now that Canon’s put in the processing power to actually scale the entire image captured on their full-frame sensor in a sane fashion (i.e. no binning or line skipping, but actual scaling) before recording into a quicktime file, that may make a huge difference from the DSLR footage we’ve all been shooting for the past few years –I expect no more moire, and much higher detail. It’s scaled from a sensor whose resolution is within the realm of the Red Epic, but whose size and likely light sensitivity is larger. I know the final result is a 1080p quicktime file and not 5k of RAW, but it still could be very very nice.
I look forward to seeing more test footage surfacing on the net, I’m particularly interested in any tests at more optimal ISOs and with noise reduction disengaged or minimized (it likely softens imagery). And I’m also looking forward to the thoughts of professional DSLR cinematography expert and C300 owner Philip Bloom on the matter, as he’ll undoubtedly push the camera to its limits and make the comparisons I’m most curious about. I want to see how sharp and detailed the imagery from this 5k+ resolution sensor scaled to 1080p can be. I’m curious to see how it compares to C300 footage and, dare I say, scaled footage from Red’s Epic-X or Scarlet-X. If Canon’s not taking shortcuts when scaling the full image from their sensor, and the 90mbps i-frame encoding preserves enough detail, it could look amazing.
If you are using dropbox, you can an additional 3Gb of free space for beta testing their new ‘Camera Upload’ feature. Follow this link for more info. I think this is neat.
If you’re not using dropbox, you’re missing out on a great online backup solution. It’s very cool –a folder on my machine is automatically backed up to “the cloud”. As soon as I add or remove files or directories within that folder, the changes propagate to “the cloud”. All my machines run the dropbox client for their OS, and this folder shows up on these systems and automatically stays in sync with the online service. It’s like a portal into that buzzword I’ve tired of, “the cloud”, but one that requires no work from the user. I rest easy knowing my important documents are stored outside my computer. If my laptop and home computer burn up in a fire, I can install the dropbox client on another machine and the folder will show up. Yay. They give you a couple gigs for free, and that’s what I’ve been using.
This is a referral link, so I will get a small amount of additional space if you sign up. I’d recommend the service regardless — what’s not to like about a couple gigs of free online space, accessible from OS X, Windows, Linux, etc ↩︎
It was alternately fun and frustrating trying to evoke and approximate the production values of an ad campaign on which Apple undoubtedly spent millions. There are only 8 shots in the piece, and the end result looks simple, but filmmaking is always a surprisingly tough slog. If you’re curious how we made the ad, read on.
tools
All but the last shot involved combinations of the following equipment:
A Canon 7D DSLR – shoots great video for the price, with a large sensor
Canon EF 50mm f/1.4 USM lens – a fast lens with creamy bokeh
Canon EF 20mm f/2.8 USM lens – a fast rectilinear wide-angle with a very close minimum focus distance
SmallHD DP6 monitor – This small 720p HD monitor is an essential focusing aid when shooting with the 7D
A Kessler “Philip Bloom Signature Edition” Slider – quick to setup, good for achieving smooth linear movement
Kino Flo Diva 400 flourescent light panels – for soft lighting
150 and 300 watt Arri lights, for harder – directional lighting
Z96 LED light – small, battery powered, easy to place and dim. Add some colored gels to make quick and easy highlights or washes of color on small areas
smoke and mirrors
The camera lies all the time; lies 24-times-per-second. –Brian De Palma
Because we were pretty sure what we wanted to achieve in each shot, and knew exactly what the camera would see, we were able to put together the bare minimum of set and lighting for each setup. Filmmaking always involves a level of illusion, but the level of fakery on this shoot approached food photography levels. Make-believe is fun. Click to enlarge any of the following images.
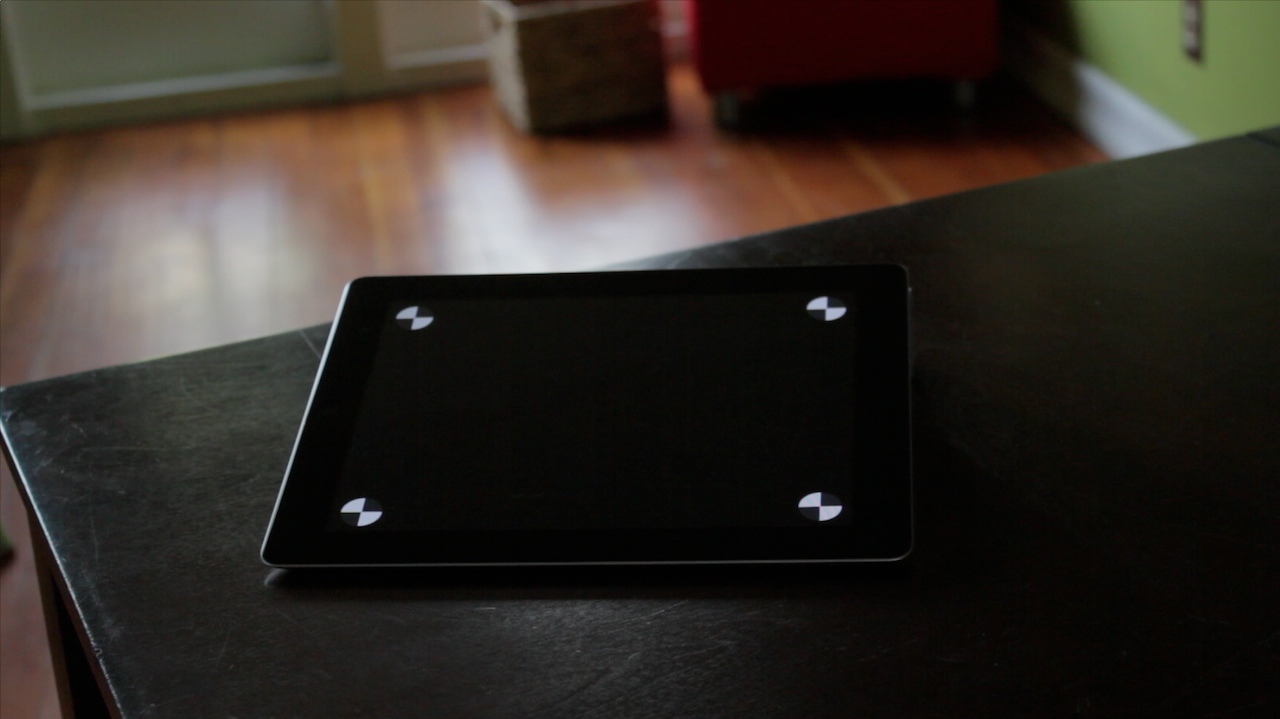
The original table top and the iPad displaying tracking markers.
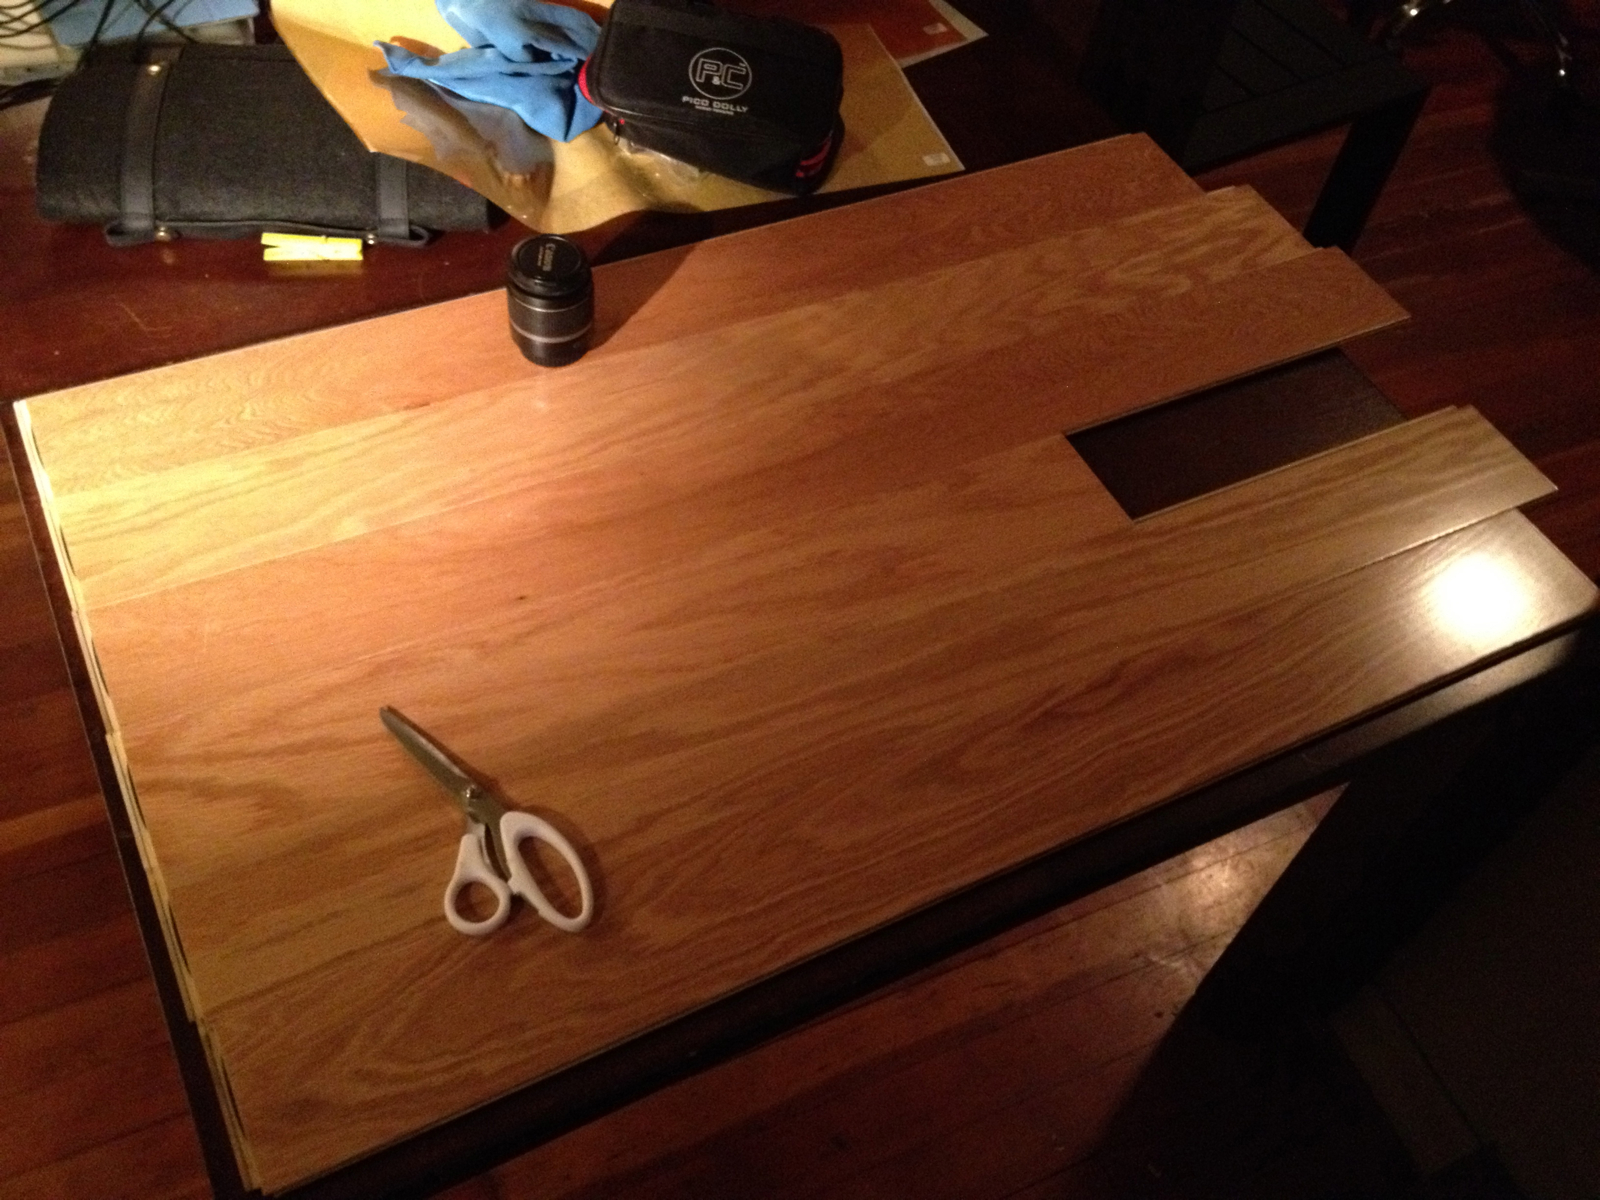
For the first shot of the piece, we decided the actual surface of the table wasn’t right. So flooring slats from Home Depot were obtained and we quickly (daylight was fast receding) made just enough of a new "tabletop" to cover what was to be visible in the frame.
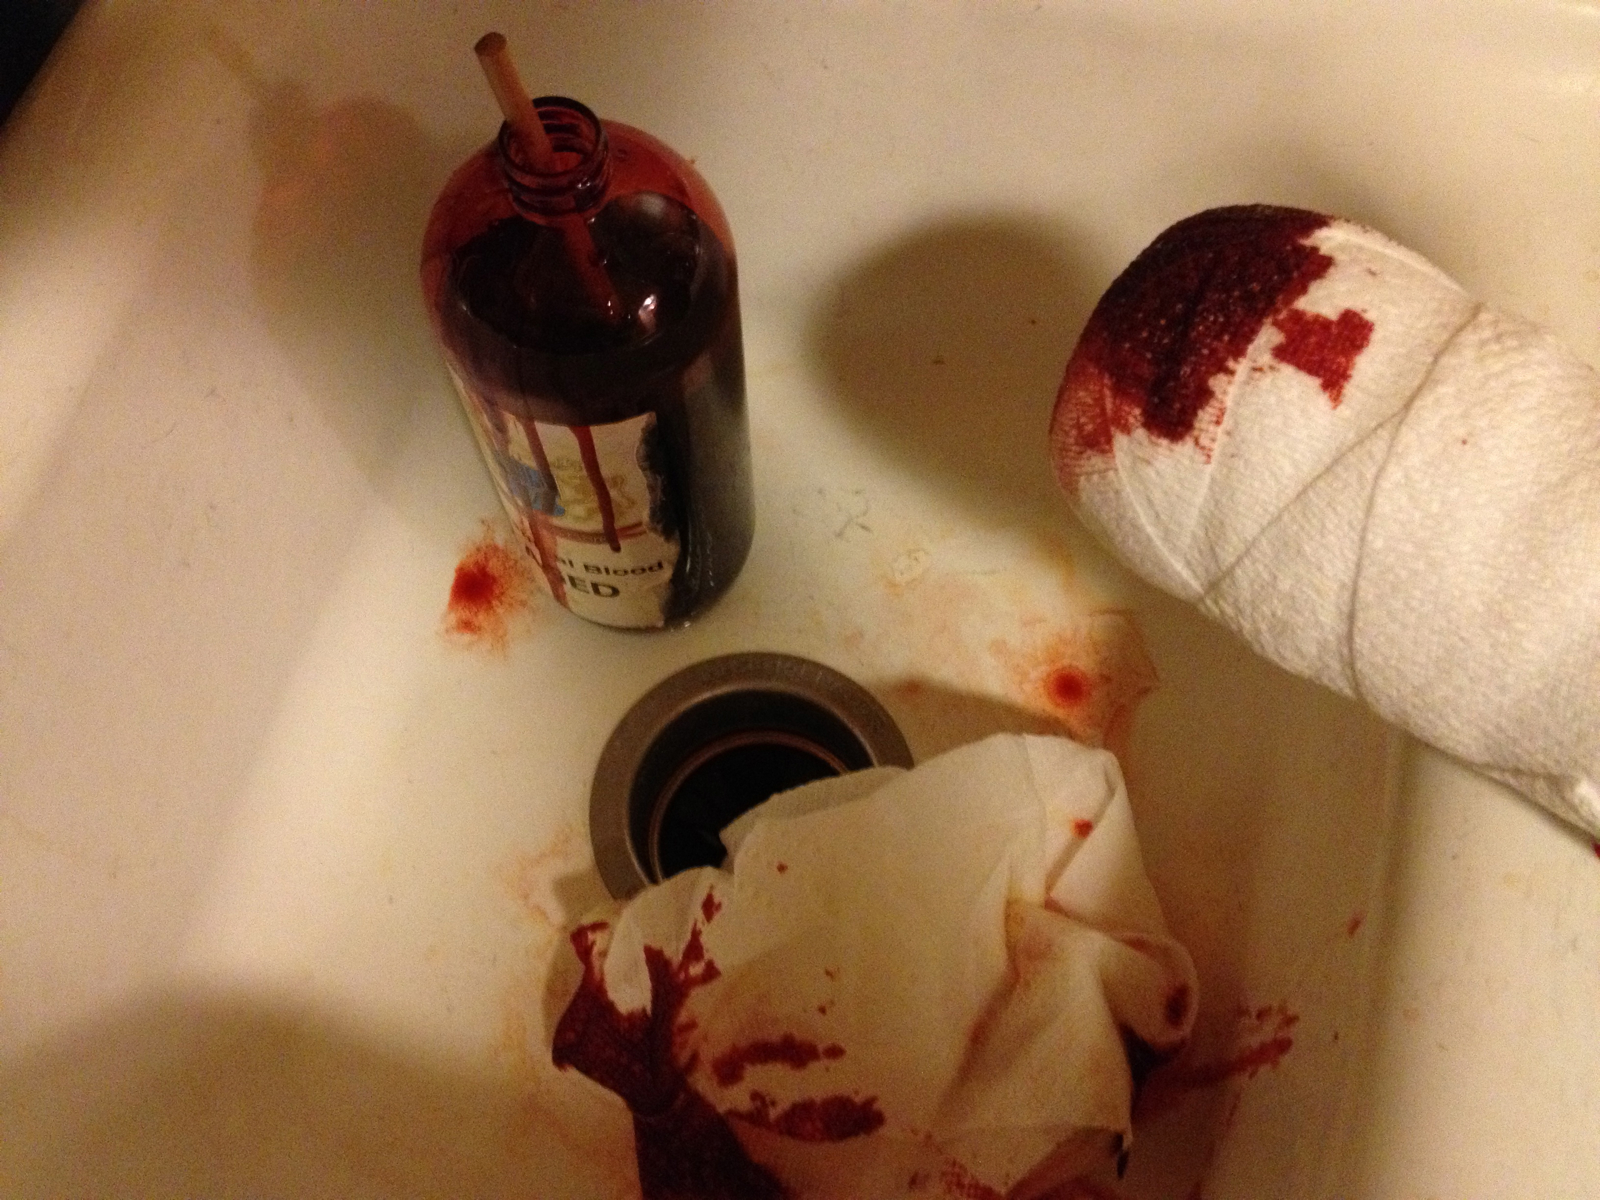
The bloody stump –a foam cylinder wrapped in gauze and daubed with fake blood. For the sake of authenticity, we used the same make of blood as was used on the Black Knight in Monty Python and the Holy Grail.
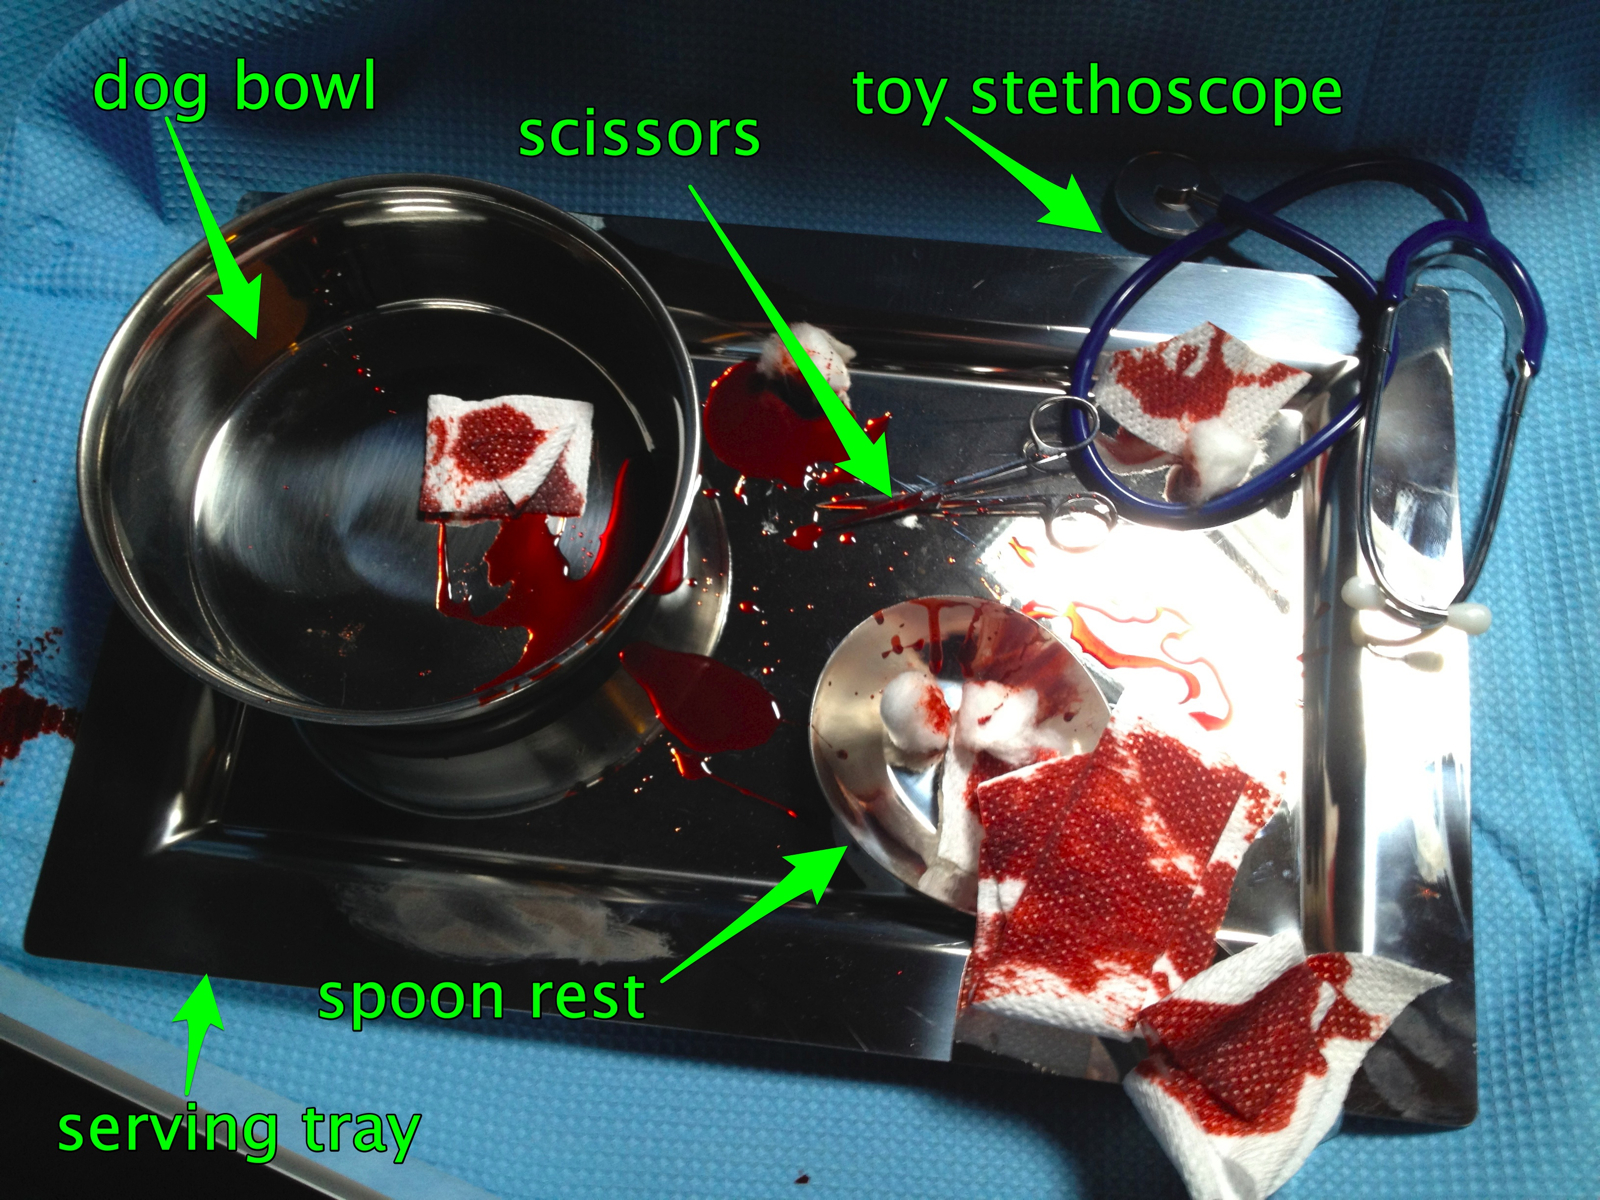
The contents of this tray have been approved for medical use in (insert name of funny-to-disparage city here), and elsewhere only for the food service and kennel industries. The handle of the spoon rest was too non-medical-looking, so we covered it with bloody gauze. Set decorating!
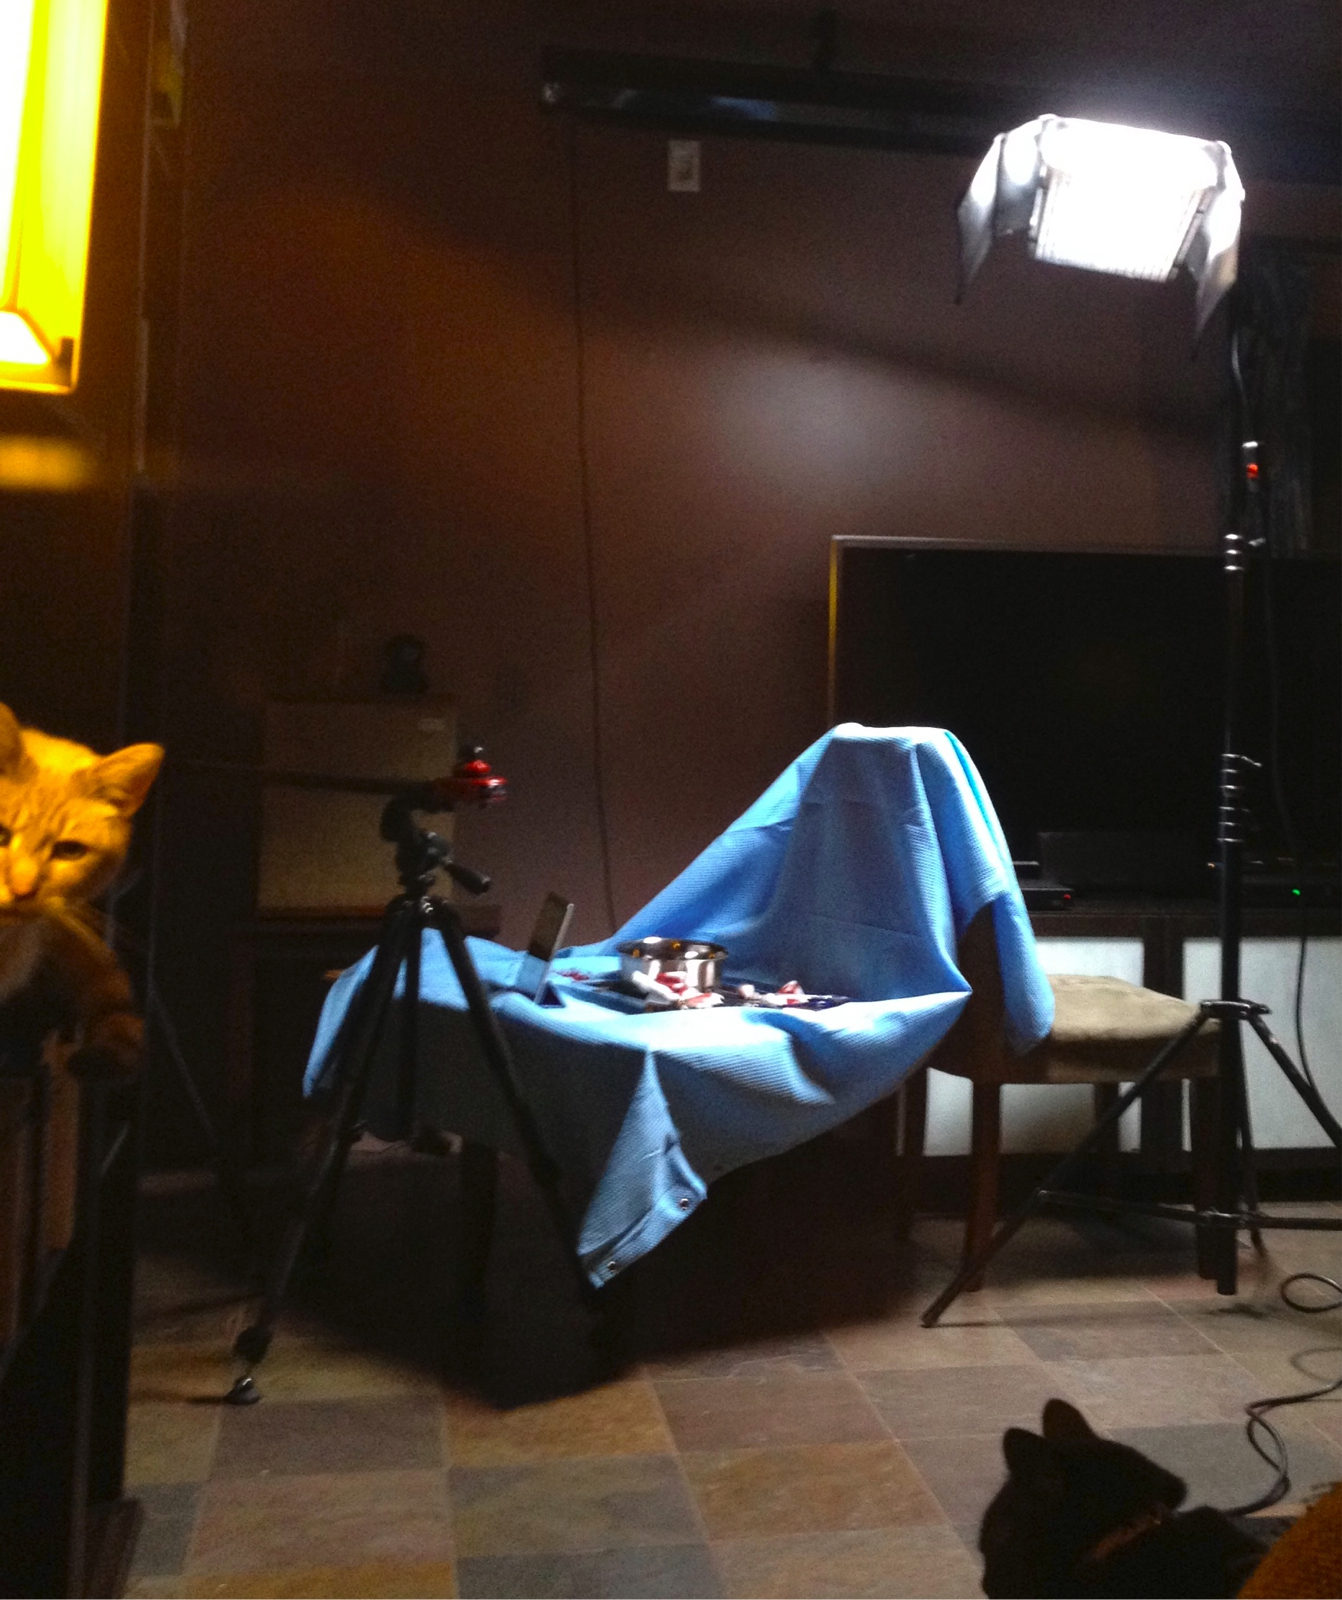
Our hospital set consisted of a blue shower curtain draped over the back of a chair and across a small table. On set security provided by a pair of trained cats.
http://zachfine.com/blog/wp-content/uploads/2012/03/blood-element-qt2.movAfter the other shots were completed, we shot blood and mud smear elements for later compositing. A piece of white cardboard served as the background, and a sheet of plexiglass was an easy-to-clean-and-reshoot surface on which to smear the various liquids. Hit play to see a couple of potential blood elements applied using the object that stood-in for the Black Knight’s bloody stump. In the end, Dane decided it would be a repeat of the same joke if the iPad screen was smeared with blood in one shot and mud in the next, so the blood elements you see here were not used. In neither this shot nor the Peasant shot did the dirty or bloody extremities touch the screen –why risk destroying an actual iPad when you can instead risk destroying your sanity by piling on compositing tasks to be done in post?
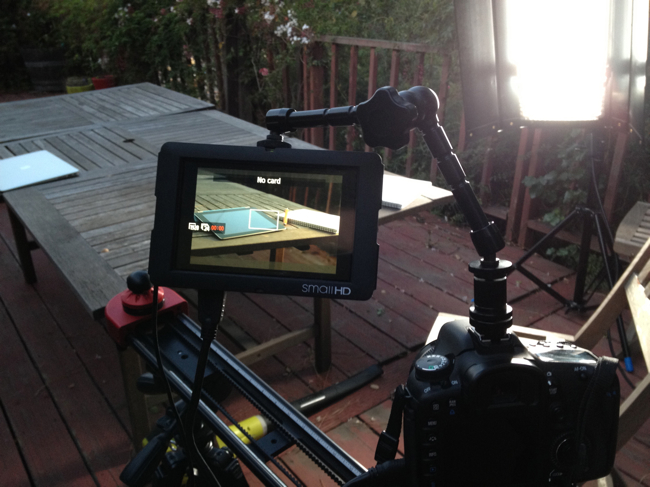
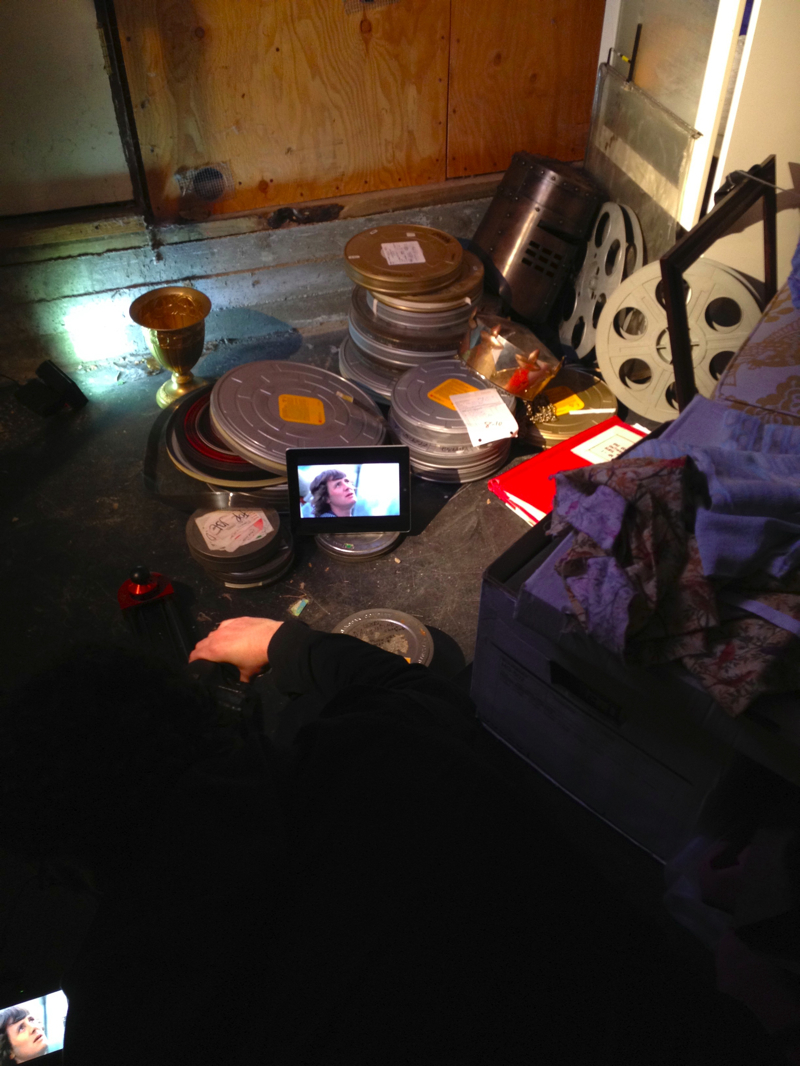
The "archives" were a carefully cluttered pile of film cans in the basement. I’m the dark mass lying on the floor, sliding and pulling focus on the camera while looking at the view on the SmallHD monitor at the extreme lower-left. The Arri’s served as a point light source, to evoke the feeling of a single light bulb in a dusty basement archive, and the Z96 unfiltered added a bit of eerie glow to the grail in the background.
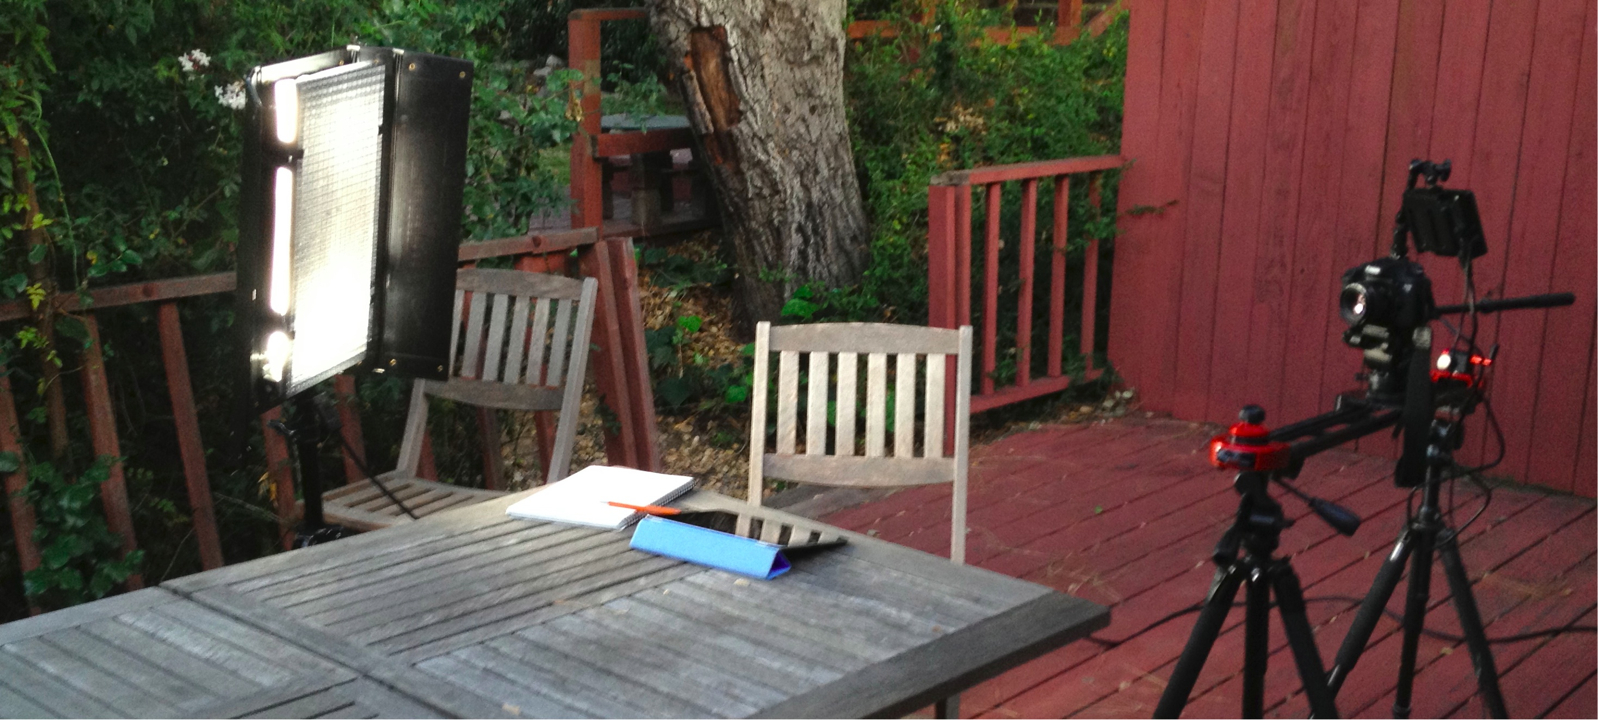
Another view of the setup for the outdoor "student" shot. The natural light had mostly faded by this point, but the Fluorescent bank placed fairly close to the subject served as a capable artificial sun. Just before the shot, I filled the mug (not pictured) with boiling water from a kettle to create steam. The Z96 LED light with an orange gel was placed to the subject’s left to fill and warm the shadows.
Post
Because we’re both editors, the distinction between production and post blurred quickly –we had capable computers at the location and a fast Firewire-800 card reader, so why not drop selected takes into a rough edit during the shoot to see how things were looking before we broke the set and moved the camera to set up the next shot? Because Dane had already procured the voiceover and music tracks before the shoot began, the ad started to take shape quickly.
Video playback was added to the iPad screens in post. There were several reasons for this decision:
In order to have a high degree of flexibility in the edit and choose footage for playback to match moments in the voiceover
Because it would be difficult to balance the lighting such that the iPad, the background, and foreground would all be exposed properly (shooting on a DSLR is a bit like shooting reversal stock in that it can look good but you have to get the exposure dead on)
The iPad would have shaken and fallen over if hands (or especially the stump) actually swiped it.
During the shoot the iPad displayed a white or black screen with tracking markers using the Chromakey app. Once the edit was together and Dane had determined which imagery from the app he wanted to appear on the iPad screens in each shot, he recorded screen captures of the app running on his iPad using the impressive “Display Recorder” app (works great, but requires a jailbroken device 1 ).
Compositing well is a very difficult task with no natural endpoint. In the best of circumstances, it ends when the result is somewhere in the “good enough” region but before the compositor has pulled out all of his/her hair. To make the composited screens acceptable to our eyes required the help of colleagues on two continents and the use of 3d matchmoving software (Syntheyes), planar tracking (Mocha for After Effects), and both Shake and After Effects for keying, lightwrap, and manual cleanup. For each shot screen playback had to be matched to the position of the screen, blurred when the iPad was not in focus, overlaid with reflections, and sometimes placed behind moving foreground objects.
The Black Knight and Peasant shots were especially problematic. The amount of blur in the Black Knight shot made for difficult tracking and keying. The Peasant shot included both difficult-to-key motion blur and the addition of mud elements.
After the compositing was done, a small amount of stabilization was done to most shots. They were pretty smooth to begin with considering that I had to simultaneously move the camera on a slider, pan/tilt it on a fluid head, and pull focus. A bit of software stabilization was needed to get the shots closer to perfection.
It was a lot of work, but judging from the behind-the-scenes material for Monty Python’s Grail film I saw in the app –we had it pretty damned easy. In the end, it’s nice to see the final product up on the web. I hope you enjoyed.
Hey Apple, please please please consider an advanced-mode toggle in iOS’s settings, off by default, to allow the .5% of users who want to risk operating their iPads in the scary world outside the app store safety net to do so without having to resort to cracking the restrictions built into the OS. We aren’t the majority of users, but we influence the purchases of family and friends, and it’d be unfortunate if we have to stop buying your wonderful hardware when you actually manage to lock it down so completely that we can’t get our needs met. Regular users would get only the default, secure iOS/app store ecosystem, the rest of us could live by choice on the wild side. Everyone wins. ↩︎